

Headless Cards
Headless Cards is a lightweight, embeddable UI module that allows partners to offer credit/debit card payments directly within their own application without loading any widget.
Our Solution
Headless Cards exposes just the card payment form as a standalone, embeddable component. Partners control where it sits, how it looks, and what happens after payment. Transak handles all the payment infrastructure in the background.
Here are some of the key benefits of the Headless Cards solution:
How does it work?
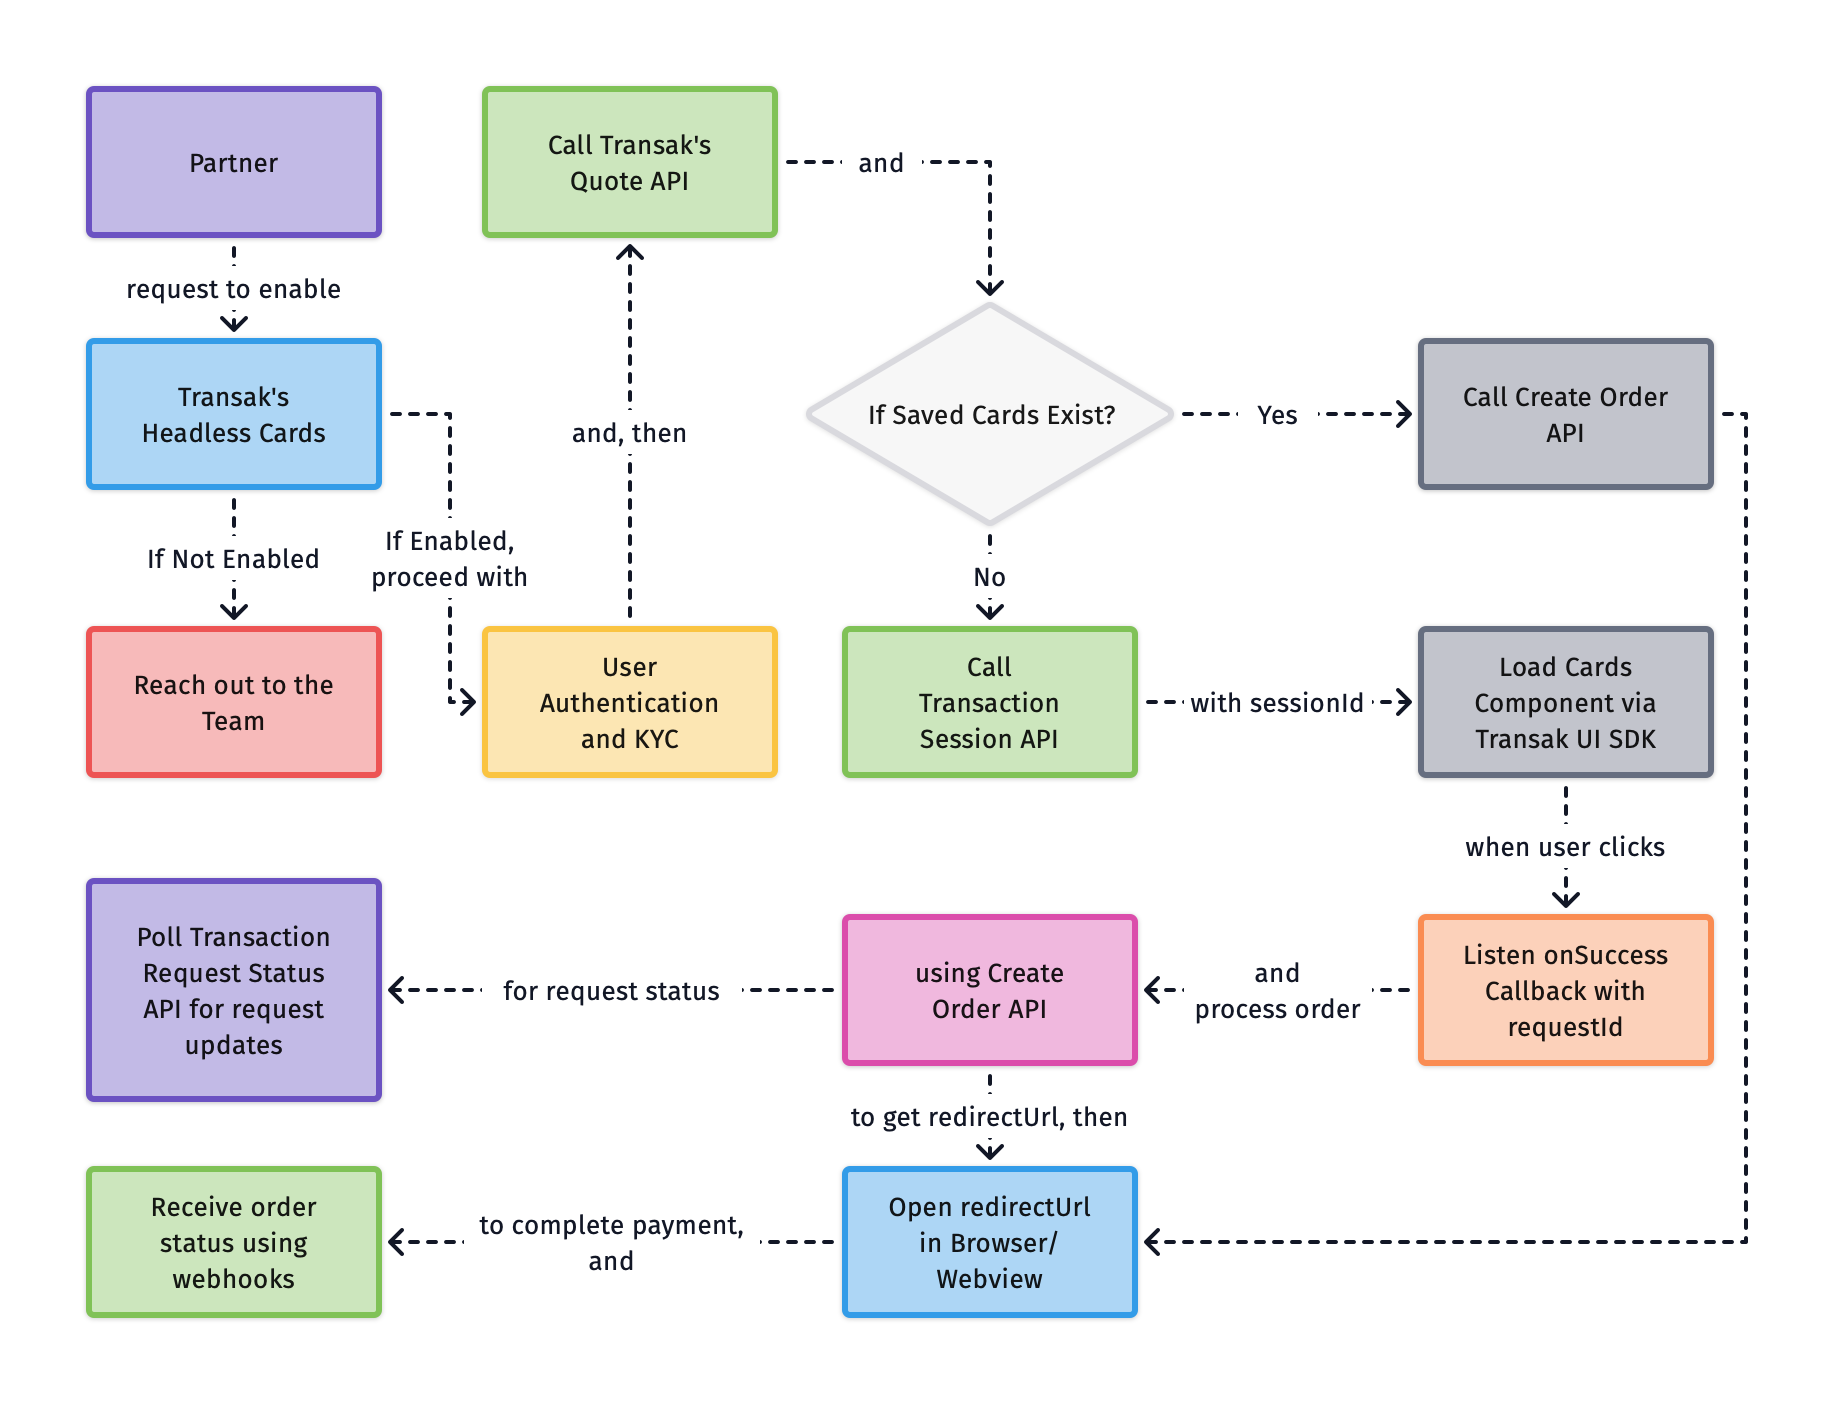
Current Limitations
How to integrate?
User Authentication
You can use either of the following authentication options:
Please refer to the tutorial on how to create partner access token.
User KYC
KYC is a mandatory step in compliance with regulatory requirements. Each user should be KYC Approved. You can use either of the following KYC options:
Generate a quote using the Quote API
Call the Get Quote API to get a quote for the transaction. Pass the apiKey, fiat amount, fiat currency, crypto currency, network, and order type.
Set paymentMethod to credit_debit_card while creating a quote.
A successful response returns a quoteId.
Check for saved cards (using Backend only)
Call the Get Saved Cards API to check whether the user has any previously saved credit/debit cards. A successful response returns a cards array.
Place order using the saved card (using Backend only)
If the user picks one of the saved cards, call the Create Order (with Saved Card) API from your backend using the quoteId, walletAddress, and the selected card’s paymentIdentifierId.
A successful response returns the full order details with redirectUrl. Continue with the Open the redirectUrl in a browser or WebView step below.
Create a transaction session (using Backend only)
Call the Transaction Session API from your backend using the quoteId, successUrl, failureUrl and the user’s wallet address. You can optionally pass a config and billingAddress object to customise the look and feel of the card component and billing details.
A successful response returns a sessionId.
Load the Card Component via Transak UI SDK
Use the Transak UI SDK to render the card payment component. Pass the sessionId received in the previous step.
JS
React
React Native
Call card.unmount() to remove the component from the page after onSuccess fires, or when the user leaves the checkout screen.
onChange callback
The onChange callback fires repeatedly as the user types and receives isValid and an optional errorCode:
onError callback
The onError callback returns one of the following error codes. Use it to handle each failure case.
Place order using the new card (using Backend only)
Once the SDK fires onSuccess with a requestId, call the Create Order (with New Card) API from your backend using the requestId to complete the payment and create the order.
A successful response returns the full order details with redirectUrl. Continue with the Open the redirectUrl in a browser or WebView step below.
Track the requestId (using Backend only)
Call the Transaction Request Status API to check whether the request has been processed. Poll this endpoint until the status reaches a terminal state.
Once you receive an orderId, use the Get Order by ID API to fetch full order details, which will contain the redirectUrl.